Agarose gel electrophoresis is a fundamental laboratory technique used in molecular biology to separate DNA fragments based on size. It is widely applied in genetic research, diagnostics, cloning, and DNA sequencing. This educational guide explains the principle, step-by-step procedure, components, advantages, and applications of agarose gel electrophoresis in a clear and student-friendly manner.
What Is Agarose Gel Electrophoresis?
Agarose gel electrophoresis is a method used to separate DNA fragments of varying lengths by applying an electric current through a porous agarose gel matrix. DNA molecules are negatively charged and migrate toward the positive electrode when an electric field is applied. Smaller DNA fragments move faster through the gel pores than larger ones, allowing separation by size.
This technique is routinely used wherever DNA fragment separation and visualization are required.
Principle of Agarose Gel Electrophoresis
The technique works on three key principles:
1. Gel Matrix
Agarose forms a semi-solid porous gel. The pore size depends on agarose concentration and determines which DNA fragment sizes can be efficiently separated.
2. Electric Field
When voltage is applied, DNA fragments migrate through the gel toward the positive electrode. Smaller fragments travel farther than larger fragments in the same time.
3. Fluorescent Visualization
DNA is visualized using ethidium bromide, a fluorescent dye that intercalates with DNA and emits orange fluorescence under ultraviolet (UV) light.
Advantages of Agarose Gel Electrophoresis
Compared to older methods such as sucrose density gradient centrifugation, agarose gel electrophoresis offers:
Direct visualization of DNA bands
Accurate size estimation using DNA ladders
Simple, fast, and cost-effective operation
High reproducibility and versatility
Agarose Gel Concentration and DNA Size Range
Agarose gels are prepared as weight/volume (%) solutions. The concentration depends on the size of DNA fragments being separated:
Low percentage gels: large DNA fragments
High percentage gels: small DNA fragments
Typically, agarose gels separate DNA fragments between 100 base pairs and 25 kilobases, but modified techniques can separate fragments up to 10 megabases.
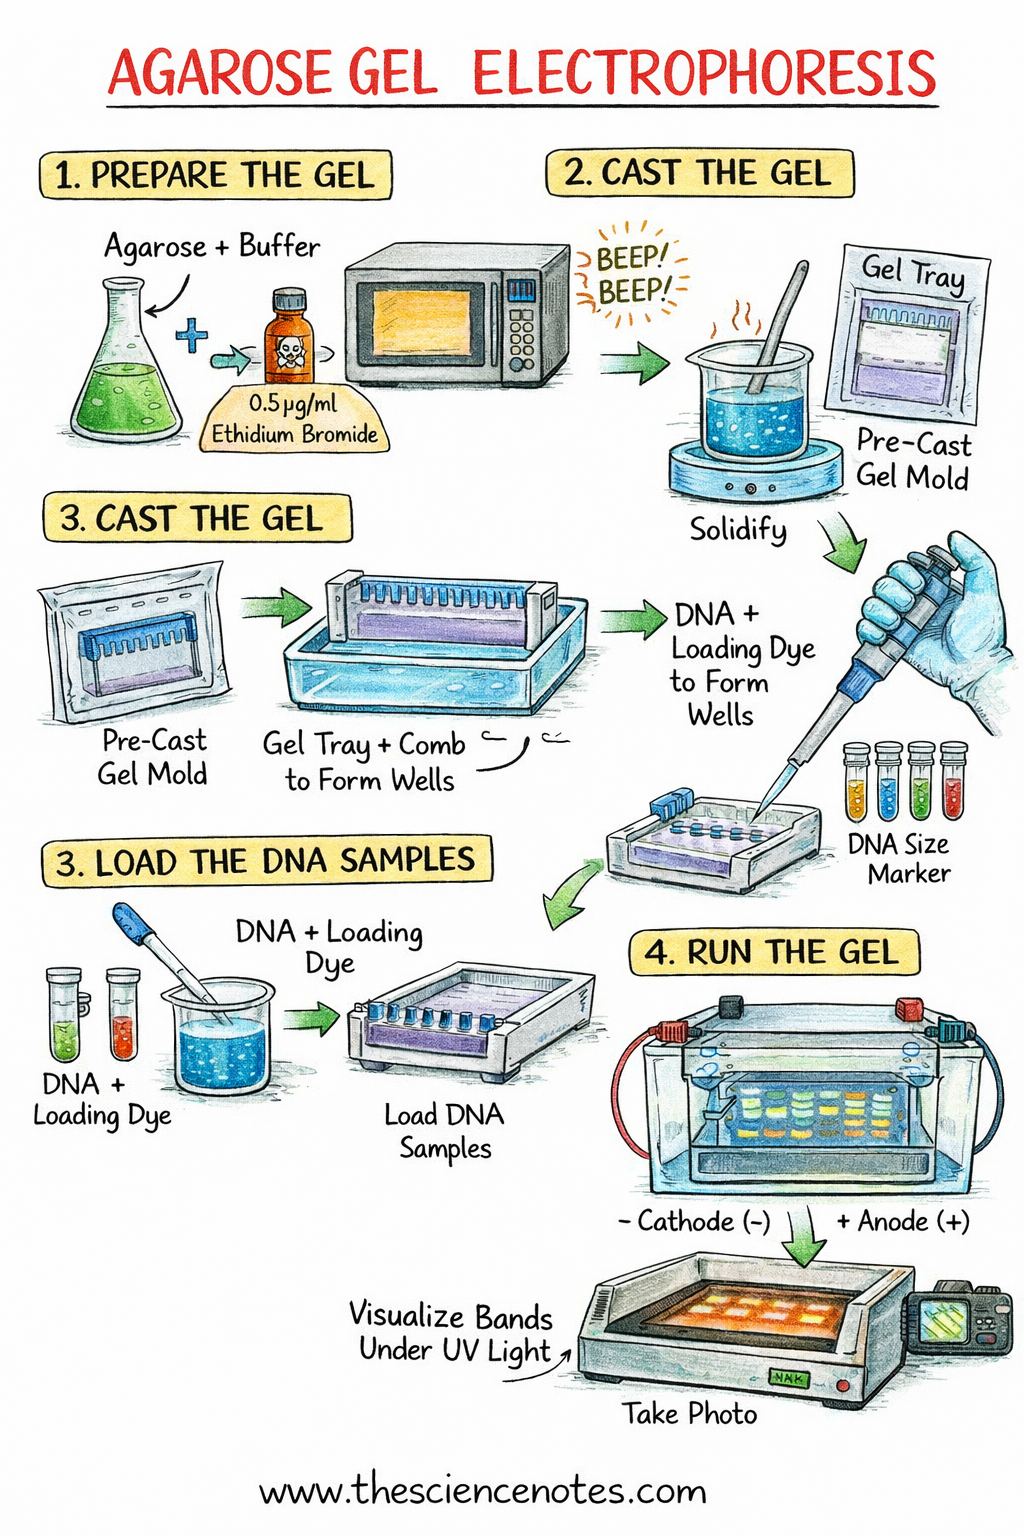
Step-by-Step Procedure of Agarose Gel Electrophoresis
1. Preparing the Agarose Gel
Weigh the required amount of agarose.
Add running buffer (not exceeding one-third of flask capacity).
Heat the mixture in a microwave until agarose dissolves completely.
Add ethidium bromide to a final concentration of 0.5 µg/mL (handle with gloves as it is carcinogenic).
Cool the solution in a 65°C water bath.
2. Casting the Gel
Place the gel tray in the casting apparatus.
Insert a comb to form wells.
Pour the molten agarose into the mold.
Allow the gel to solidify at room temperature.
Remove the comb carefully.
3. Loading DNA Samples
Mix DNA samples with loading dye (typically 6×).
Place the gel in the electrophoresis tank.
Add running buffer to cover the gel surface.
Load DNA samples and a DNA size marker (ladder) into the wells.
4. Running the Gel
Connect electrodes correctly to ensure DNA migrates in the correct direction.
Apply the desired voltage.
Observe bubble formation at electrodes to confirm current flow.
Run the gel until the dye reaches an appropriate distance.
5. Visualization of DNA Bands
Turn off the power supply.
Remove the gel and blot excess buffer.
Expose the gel to UV light using a gel documentation system.
DNA appears as orange fluorescent bands.
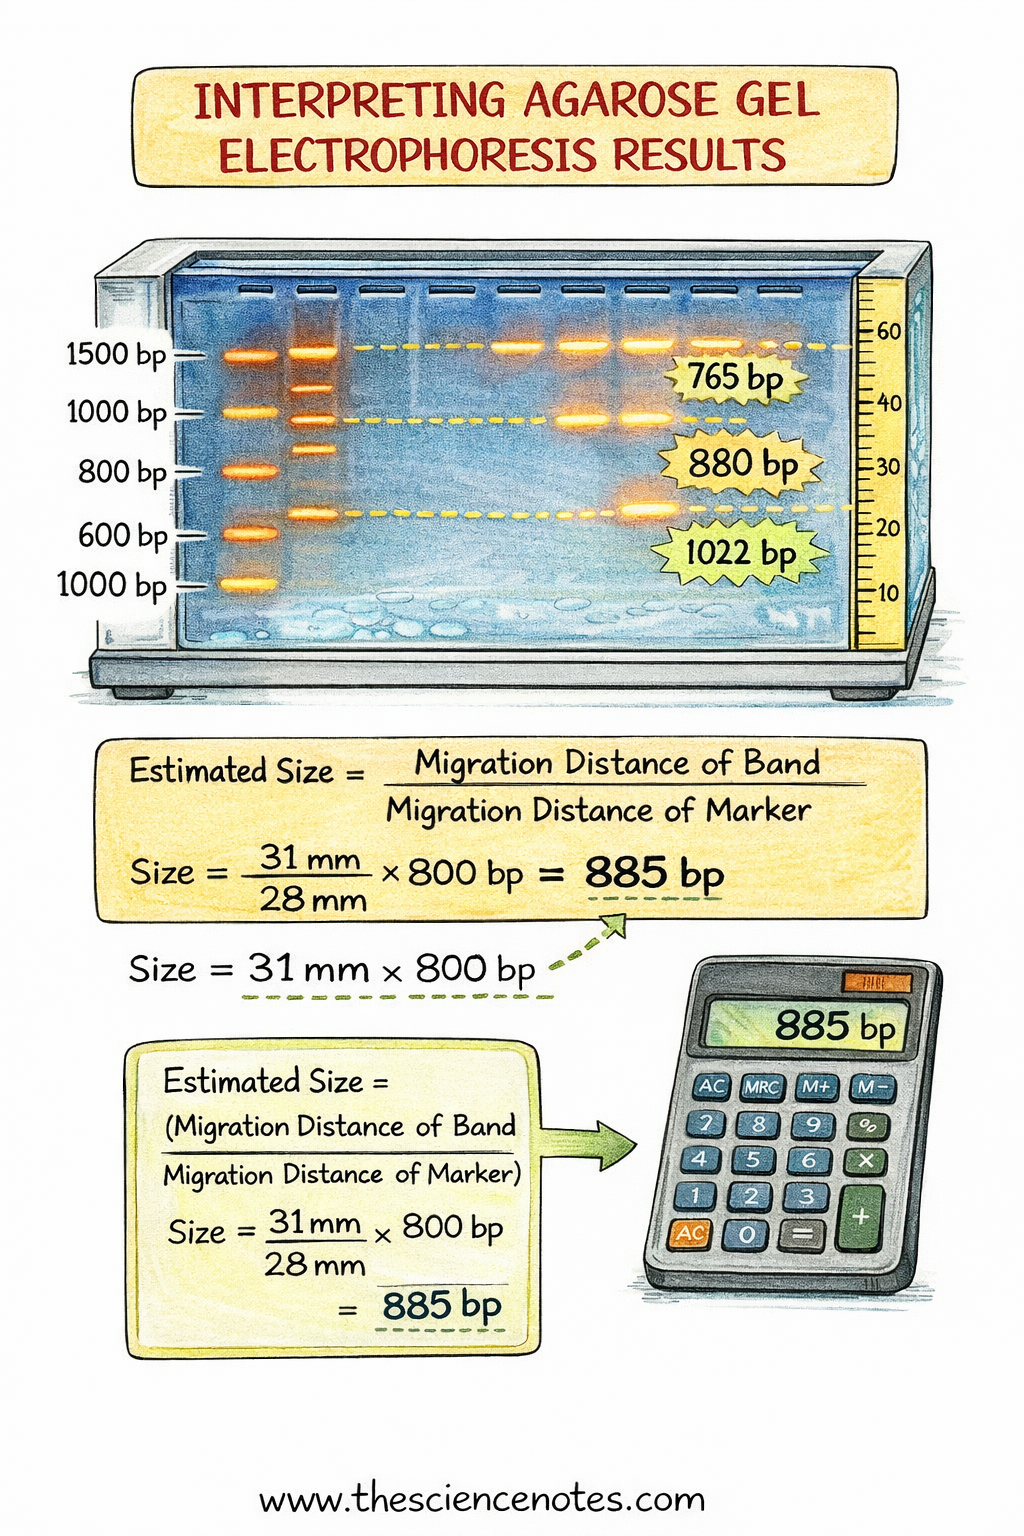
Interpreting Results
After electrophoresis:
DNA fragments appear as distinct bands.
The DNA ladder allows estimation of fragment size.
For example, fragments of 765 bp, 880 bp, and 1022 bp can be clearly resolved on a 1.5% agarose gel.
Applications of Agarose Gel Electrophoresis
Agarose gel electrophoresis is essential in life science research, including:
PCR product analysis
Gene cloning
DNA purification
DNA sequencing
Genetic diagnostics
Molecular size determination
Safety Considerations
Ethidium bromide is hazardous and carcinogenic
Always wear gloves, goggles, and lab coats
Dispose of gels and buffers according to institutional safety regulations
Conclusion
Agarose gel electrophoresis is a powerful, reliable, and widely used technique for separating and analyzing DNA fragments. Understanding its principles, proper gel preparation, correct electrode placement, and safe handling practices is essential for obtaining accurate and reproducible results in molecular biology experiments.